MKhost Knowledgebase
Need help? Search or browse our large collection of articles on a variety of topics including hosting, domains, emails and more .
WordPress Toolkit Deluxe features
How to clone a WordPress site?
A cloned site is a duplicate of a site hosted on your server. It has the same files and content, and all the databases are identical to the original. The only difference is that the cloned site is hosted on a different domain or subdomain.
There are many reasons to clone a site. Because the copies are identical to the existing site, cloning helps you set up a test site and a staging site. It is also a quick and easy way to set up a new site, using the old one as the base configuration.
Site owners often use cloned sites to give designers and developers access to the working environment.
Instructions for cloning WordPress
Log in to your cPanel account with the appropriate username and password, and then in the Domains section click on WordPress Toolkit.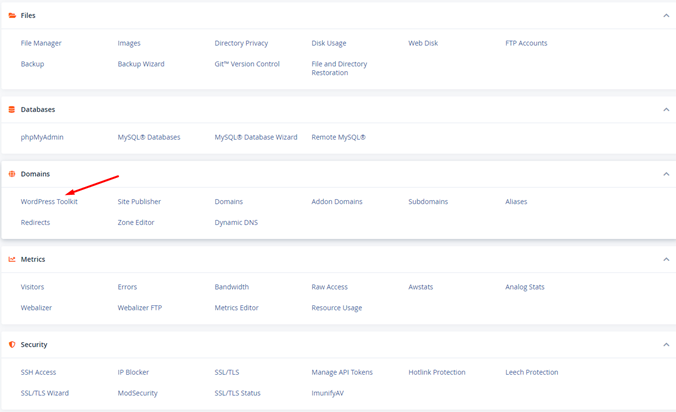
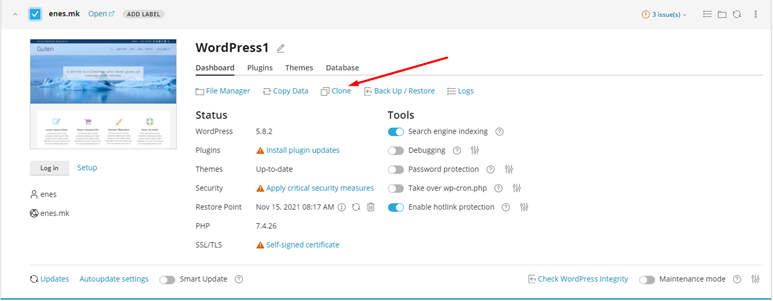
Then select the site and click on Clone.
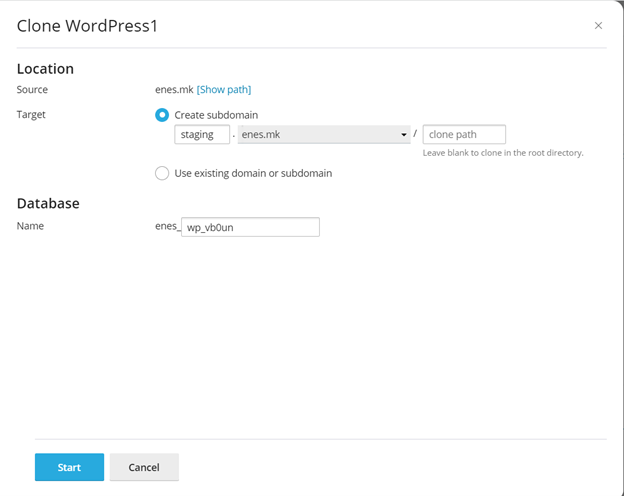
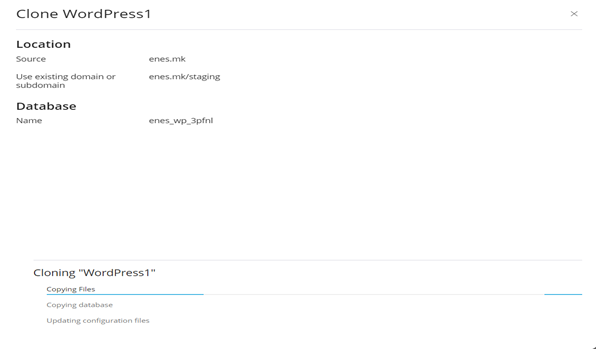
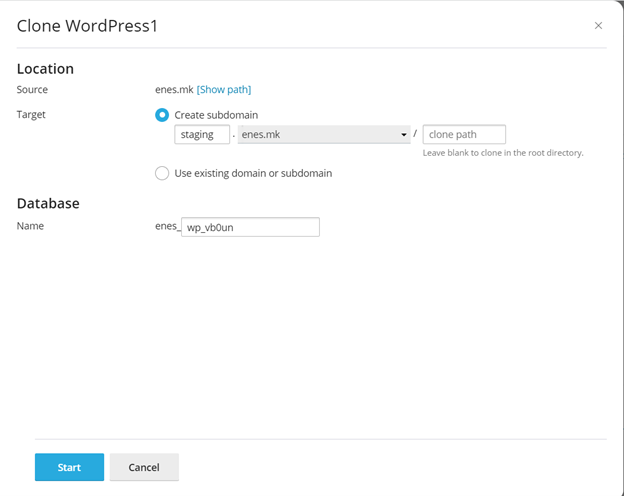
On the next page that opens, fill in the details to start cloning WordPress.
- Create subdomain - select this if you want the cloned site to be set up by creating a separate subdomain.
- Use existing domain or subdomain - if you want to clone the site onto an existing domain or subdomain.
- Database; Name - enter the name of the database.
- Finally, click on the Start button.
- With that, the cloning begins.
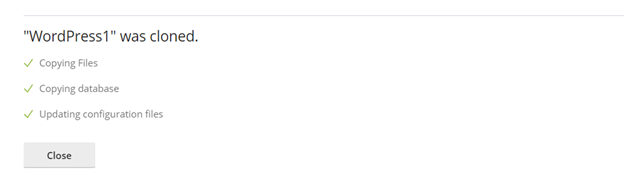
 At the end you will get a message on the screen notifying you that the cloning has been completed successfully.
What is a WordPress Staging Site?
A Staging Site is a cloned site that has all the data and files, but is not available to the public, and is usually hosted on a different subdomain. All the changes made on the Staging Site are not transferred to the final site or Production Site until you decide to take that step.
How to set up a WordPress Staging Site?
Log in to your cPanel account with the appropriate username and password. In the Domains section click on WordPress Toolkit.
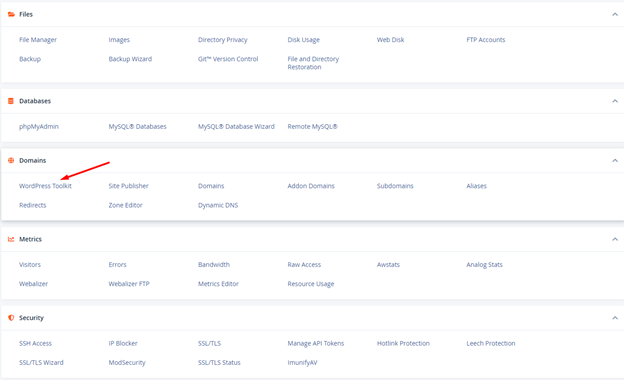
Then select the site and click on Clone.
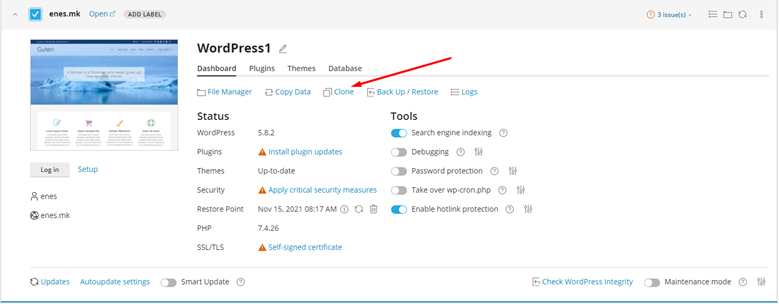
On the next page that opens, fill in the details to start cloning WordPress.
- Create subdomain - select this if you want the cloned site to be set up by creating a separate subdomain.
- Use existing domain or subdomain - if you want to clone the site onto an existing domain or subdomain.
- Database; Name - enter the name of the database. Finally, click on the Start button.
- With that, the cloning and the creation of the Staging Site and the subdomain begins.
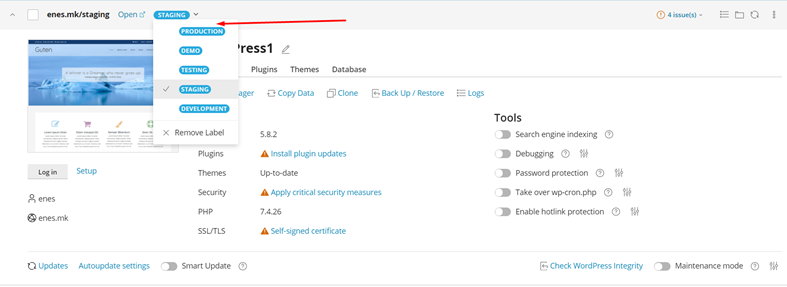
Once the whole process is finished, you can access the Staging Site through the WordPress Toolkit interface. To make it easier to tell the Staging Site apart from the final site, use the WordPress Toolkit Labels. Click Add Label and choose the appropriate option from the menu.
Applying changes from the Staging Site to the final site.
Once the building and testing of the website is finished, it is time for the changes to be applied to the final site. To do that, you need to copy the database and the files from the Staging Site.
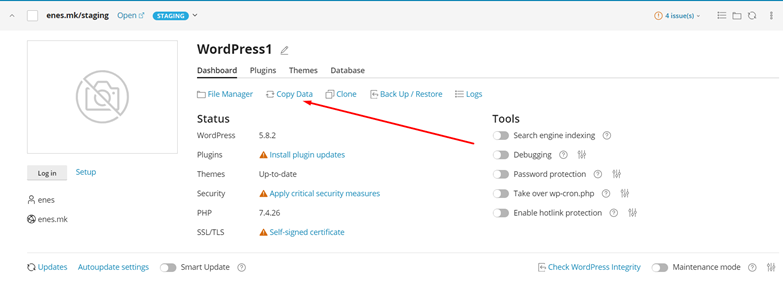
In the WordPress Toolkit interface of the Staging Site, click on Copy Data.
On the next page that opens, fill in the details to start the copying from the Staging Site to the final WordPress site.
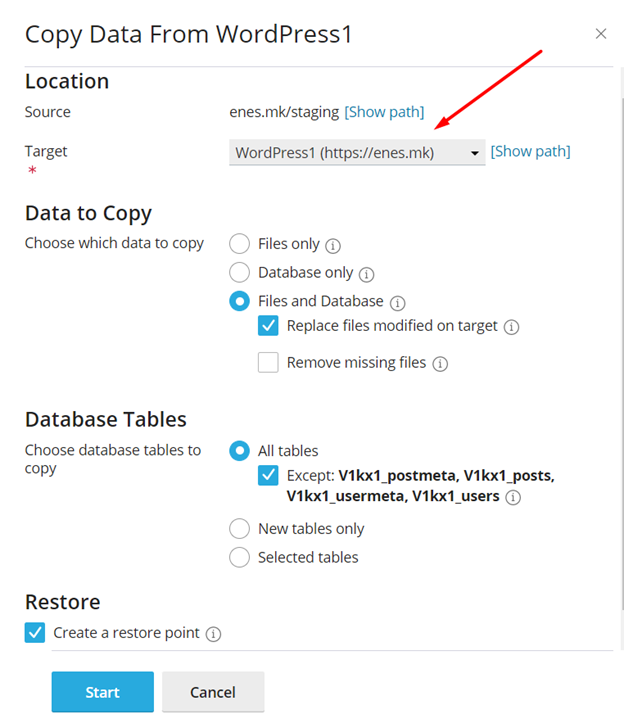
- Target - select the final site where you want to apply the changes
- Data to Copy - choose whether you want only files, the database, or absolutely everything to be copied
- Database Tables - choose whether all the tables should be copied, only the new ones, or ones selected by you.
- Restore - choose whether a Restore point should be created, so that in case of an error during the copying, everything can be returned to its previous state.
- Finally, click on the Start button.
- With that, the cloning begins.
Smart Updates in WordPress Toolkit
Smart Updates allows users to test updates to their website, plugins and themes, without that affecting the site itself.
Smart Updates creates a complete clone of the website, performs a large number of preliminary checks, updates the cloned site, and then checks again whether anything broke during the update. It creates a report that makes it possible to visually compare the site before and after the update. If everything is fine, the user confirms, and WordPress Toolkit updates the main site and clears the clone.
How to enable the Smart Updates option in WordPress Toolkit
Instructions for cloning WordPress.
Log in to your cPanel account with the appropriate username and password
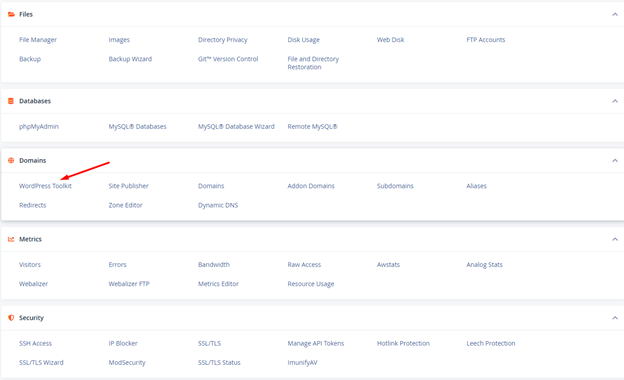
In the Domains section, click on WordPress Toolkit.
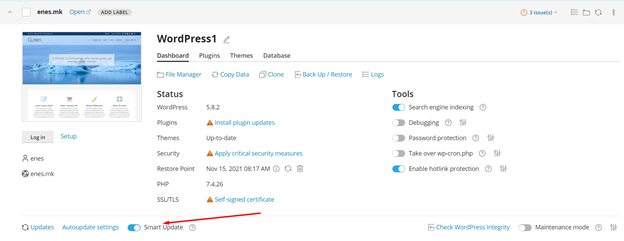
Then select the site and click on Smart update.
What is Hardening in WordPress Toolkit
All WordPress sites can be scanned through WordPress Toolkit, in order to identify and protect the core installations, without the need for manual work.
With just one click on the Scan option in WPT, the scanning begins. Several scans can be run at the same time.
Log in to your cPanel account with the appropriate username and password
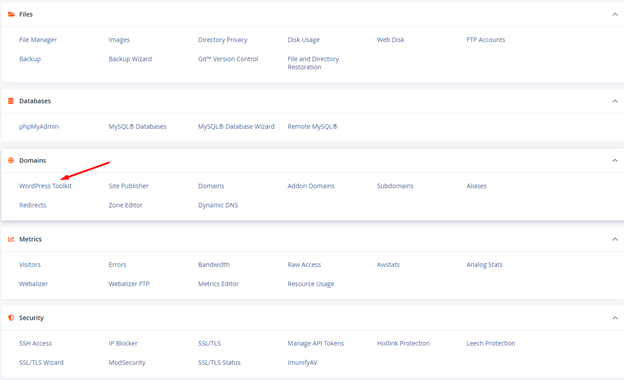
In the Domains section, click on WordPress Toolkit.
Choose which site you want to scan, and click on the Scan button.
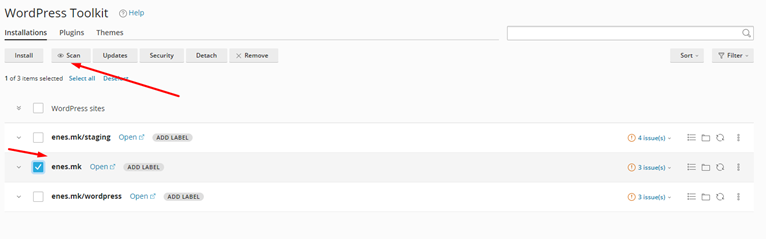
You wait for the scanning process to finish. Once it is finished, all the errors on your site and suggestions appear on the right-hand side. By clicking on them, we get another page where we can fix them.